How to make a quick cut face covering with AFSCME T-shirt
Protect yourself and others while showing your union pride by making a cloth face covering out of an AFSCME T-shirt. This is a quick cut method that requires no sewing!
Credit: Kate Vanier – AFSCME Council 13 Education & Resources Dept.
Cloth face coverings or masks are not recommended for medical use for health care providers except as a last resort. Cloth face coverings are recommended for the general public when leaving the home and help to prevent asymptomatic carriers from spreading viruses to other people. This works best when as many people as possible are wearing cloth face coverings when outside of their homes.
AFSCME T-shirts, or any t-shirts for that matter, can be used to make a quick, no sew version of a face covering. In this tutorial, a size Medium AFSCME Council 13 T-shirt was used and could create up to four face coverings – two large masks for larger adults, and two small masks for smaller adults and youth/children. Larger size T-shirts could potentially make more masks.
T-shirt face coverings provide a minimal amount of protection. If possible, use a 100% cotton T-shirt with a tight knit and very little stretch. They can be doubled up for extra peace of mind, if desired. Face coverings and masks should be washed after every use, so it’s a good idea to have at least two masks per person – five masks per person is more ideal.
Materials:
- T-shirt
- Scissors
Tutorial:
Source: https://www.cdc.gov/coronavirus/2019-ncov/prevent-getting-sick/diy-cloth-face-coverings.html
Instructions:
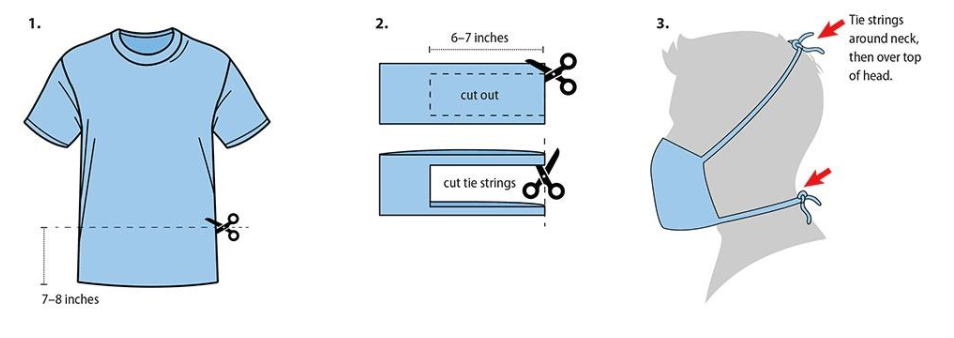
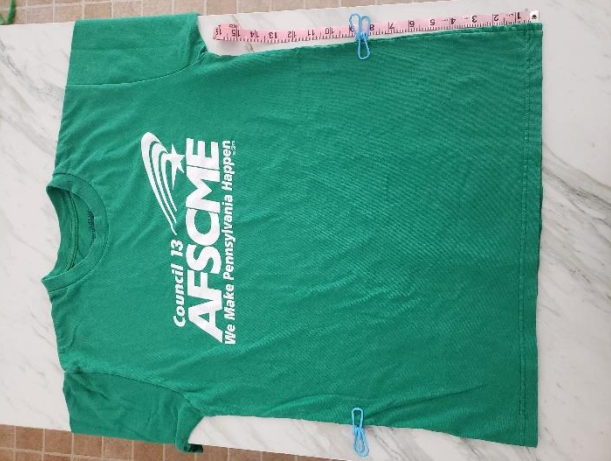
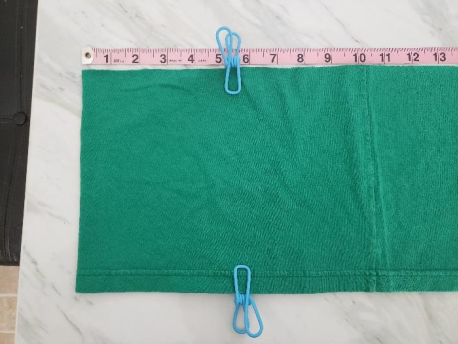
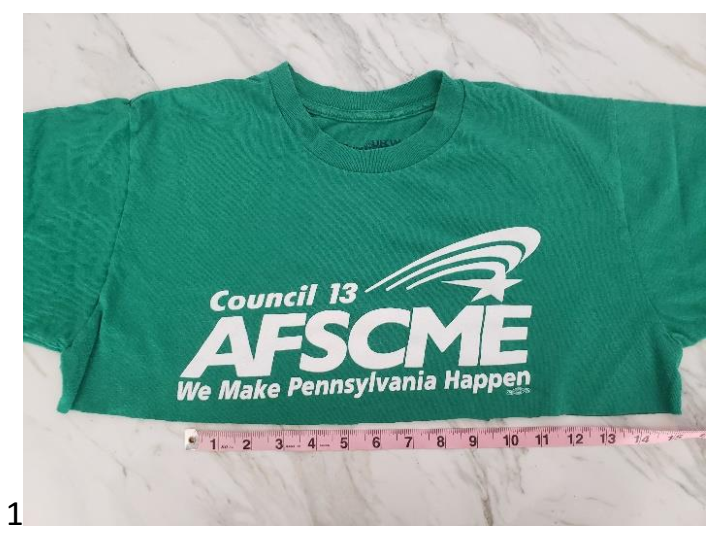
1. Lay your AFSCME T-shirt flat and smooth the fabric to remove as many wrinkles as possible. Be sure to line up the front and back of the bottom hem.
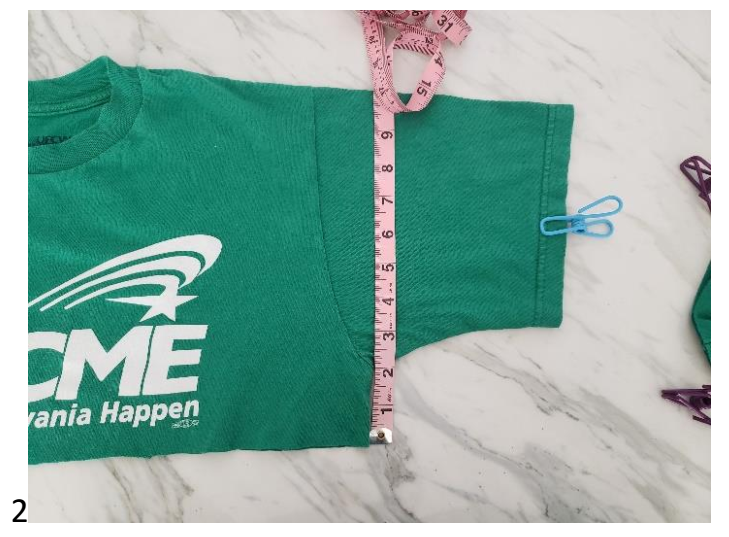
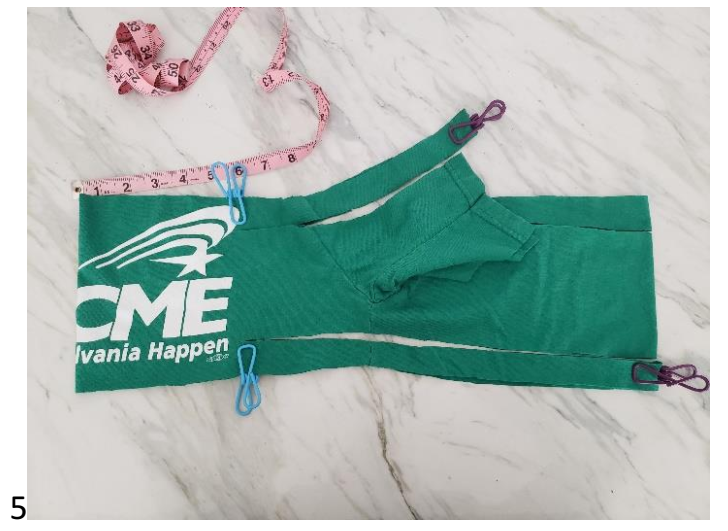
(A) Measure approximately 7-8 inches from the bottom hem on both sides of the shirt. You can mark the measurements on both sides with clothespins, hair/bobby pins, straight pins, safety pins, chip clips, paperclips, etc.
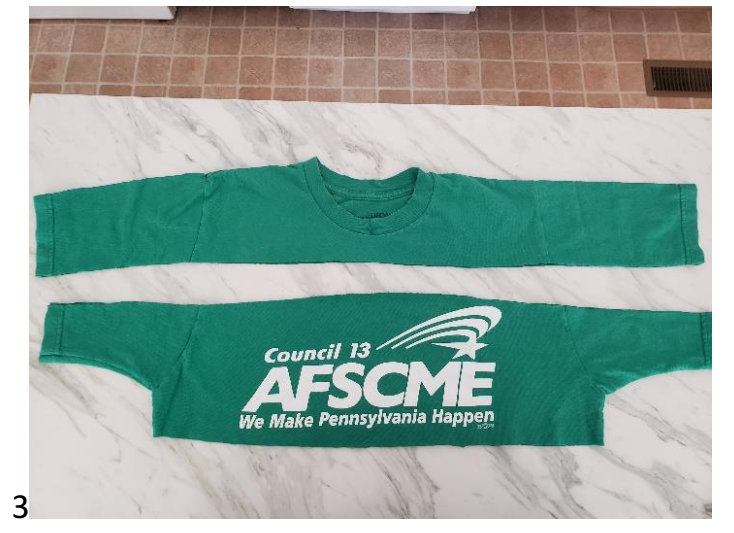
(B) Cut from one the markings through both layers of the shirt straight across from one side of the shirt to the other. This creates a loop of fabric that is the base for your face covering.
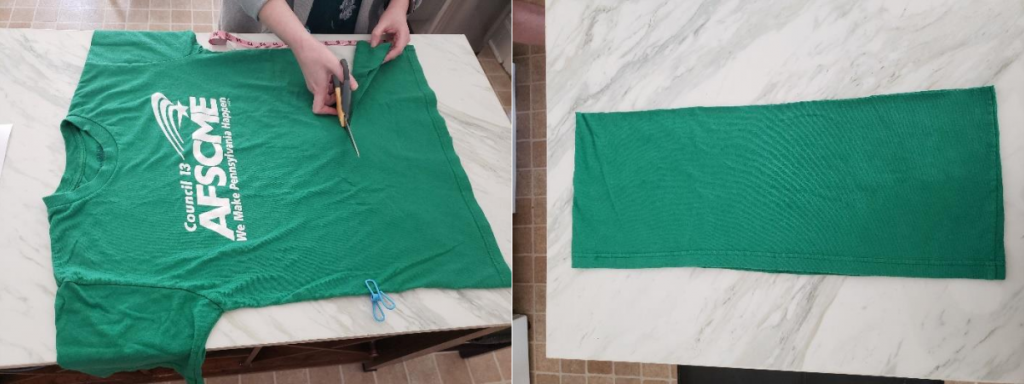
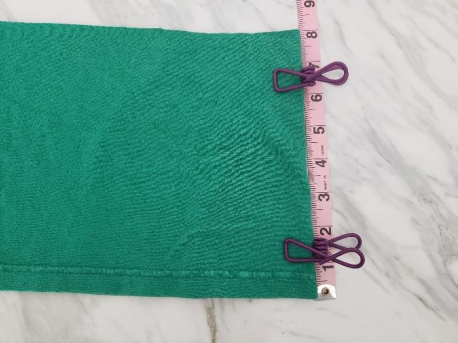
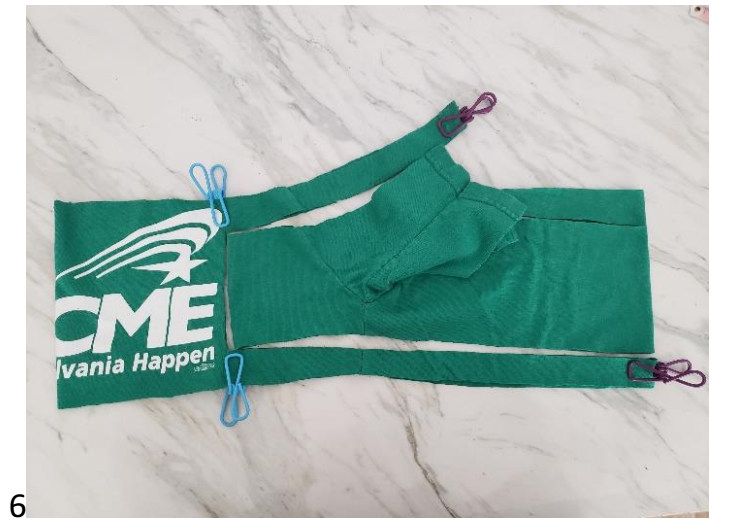
2. Lay your fabric loop flat and smooth the fabric to remove wrinkles and line up all the edges.
(A) If your T-shirt has seams sewn into one or both sides, you may want to place the seams in the center of the loop so that the finished mask will not have a seam at the nose (this might be irritating).
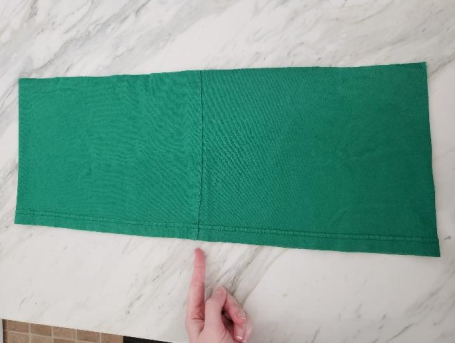
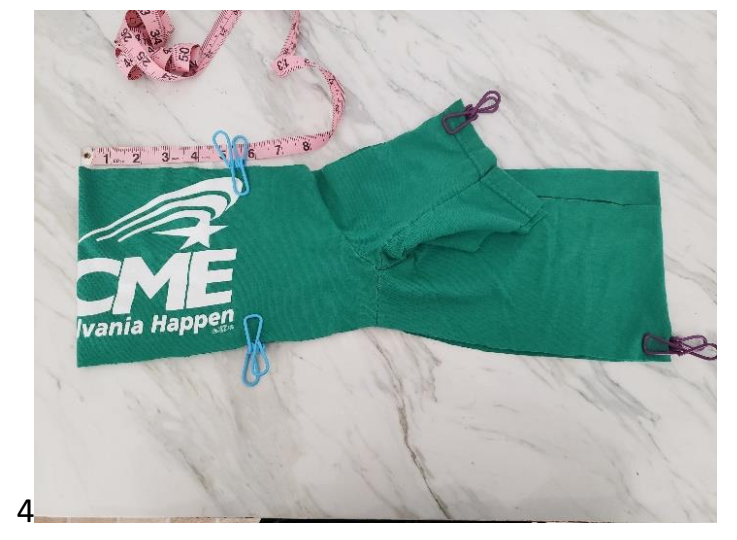
(B) Measure 4-5 inches from the left side of your fabric loop and mark the measurements at the top and bottom of the loop. This is the portion of the fabric that will cover the face. Because the fabric is doubled, this will create an 8-10 inch width across the face.
(C) On the right side of your fabric loop, measure approximately 1 inch from the top and the bottom and mark those measurements.
(D) Cut horizontal lines through both layers of the shirt from the 1-inch measurements on the right side of the fabric to the measurements that you marked on the left side of your fabric loop. Then, cut a vertical line from the bottom to the top to remove the entire section from the fabric loop. This forms the ties that will be used to fasten the face covering around your head. The ties should be at least 6-7 inches long to be able to fit around the head and can be shortened if desired.
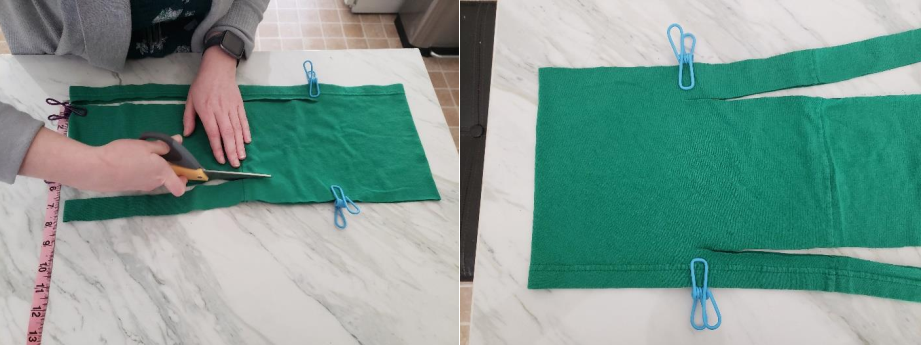
*Note: The smaller rectangle you’ve cut out can be used to create smaller masks for children. Simply repeat Step 2 (C) and (D) to create a smaller mask.
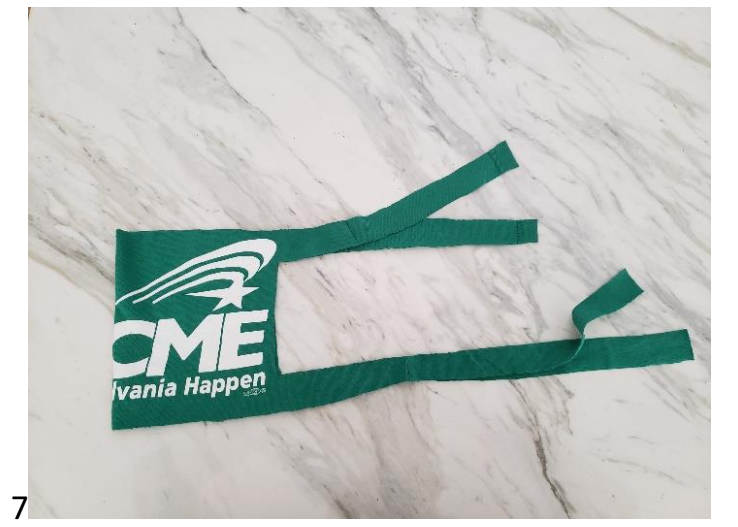
(E) Finally, cut the center of both of the ties to complete your face covering.
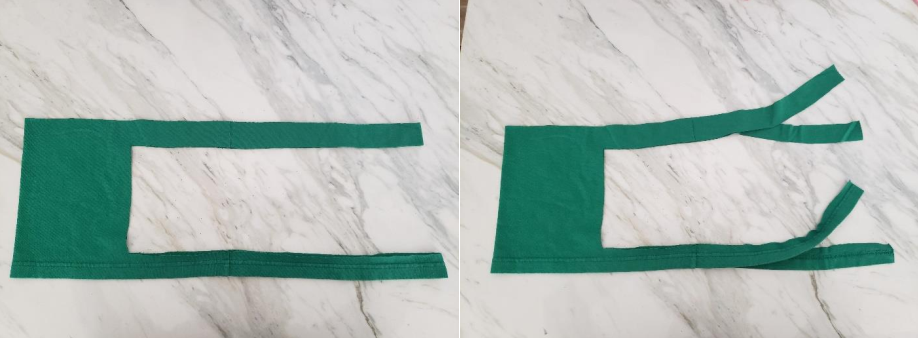
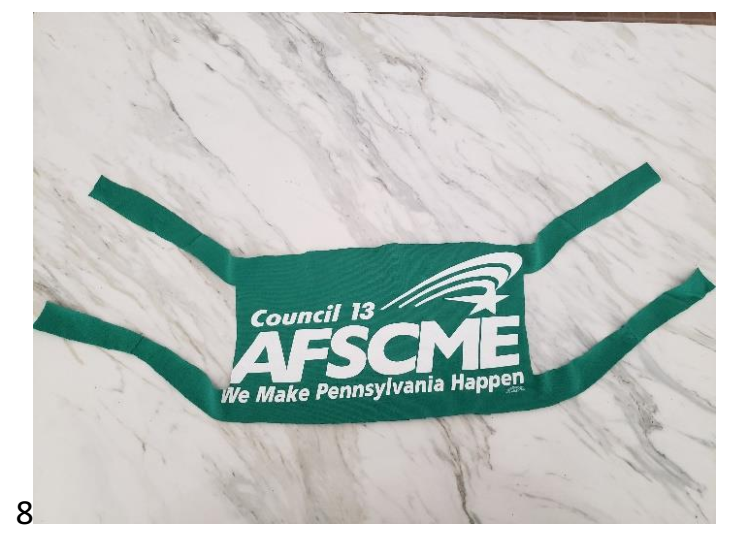
3. Center the large rectangle of the face covering over the mouth and nose. Fasten one set of ties around the neck and the other set of ties at the back of the head. The ties should be pulled tight enough to wrap the fabric around the face and under the chin, but loose enough to allow easy breathing.
Notes:
• You can continue to make more masks from your T-shirt by measuring from the bottom of your last cut.
• Once you get to the area of the shirt where the sleeves are connected to the body, cutting gets a little trickier since you’ll have to use part of the sleeves for the ties, but there is still enough fabric to create a mask with the AFSCME logo on it! See the step by step pictures below for reference!
For a PDF of these instructions, click here.
For more information on using cloth face coverings, click here.
For information on how to clean and reuse cloth masks, click here.
For information on how to clean and reuse an N95 mask, click here.
For a comprehensive guide on how to make five types of DIY face masks at home, click here.